Disclaimer!

It has come to our attention that 'Valley Gate' has religious connotations. For those of you who have arrived here expecting an allegory on the Gates of Jerusalem, you are going to be sorely disappointed! 'Valley Gate' is the name of the house and the association derives from the name of our road. Valley Farm is just down the road......

Monday 19 January 2015

Hen House Part 4

We were very fortunate to receive lots of good advice on the construction of the hen house from our good friends Norman and Alec (not a couple!).

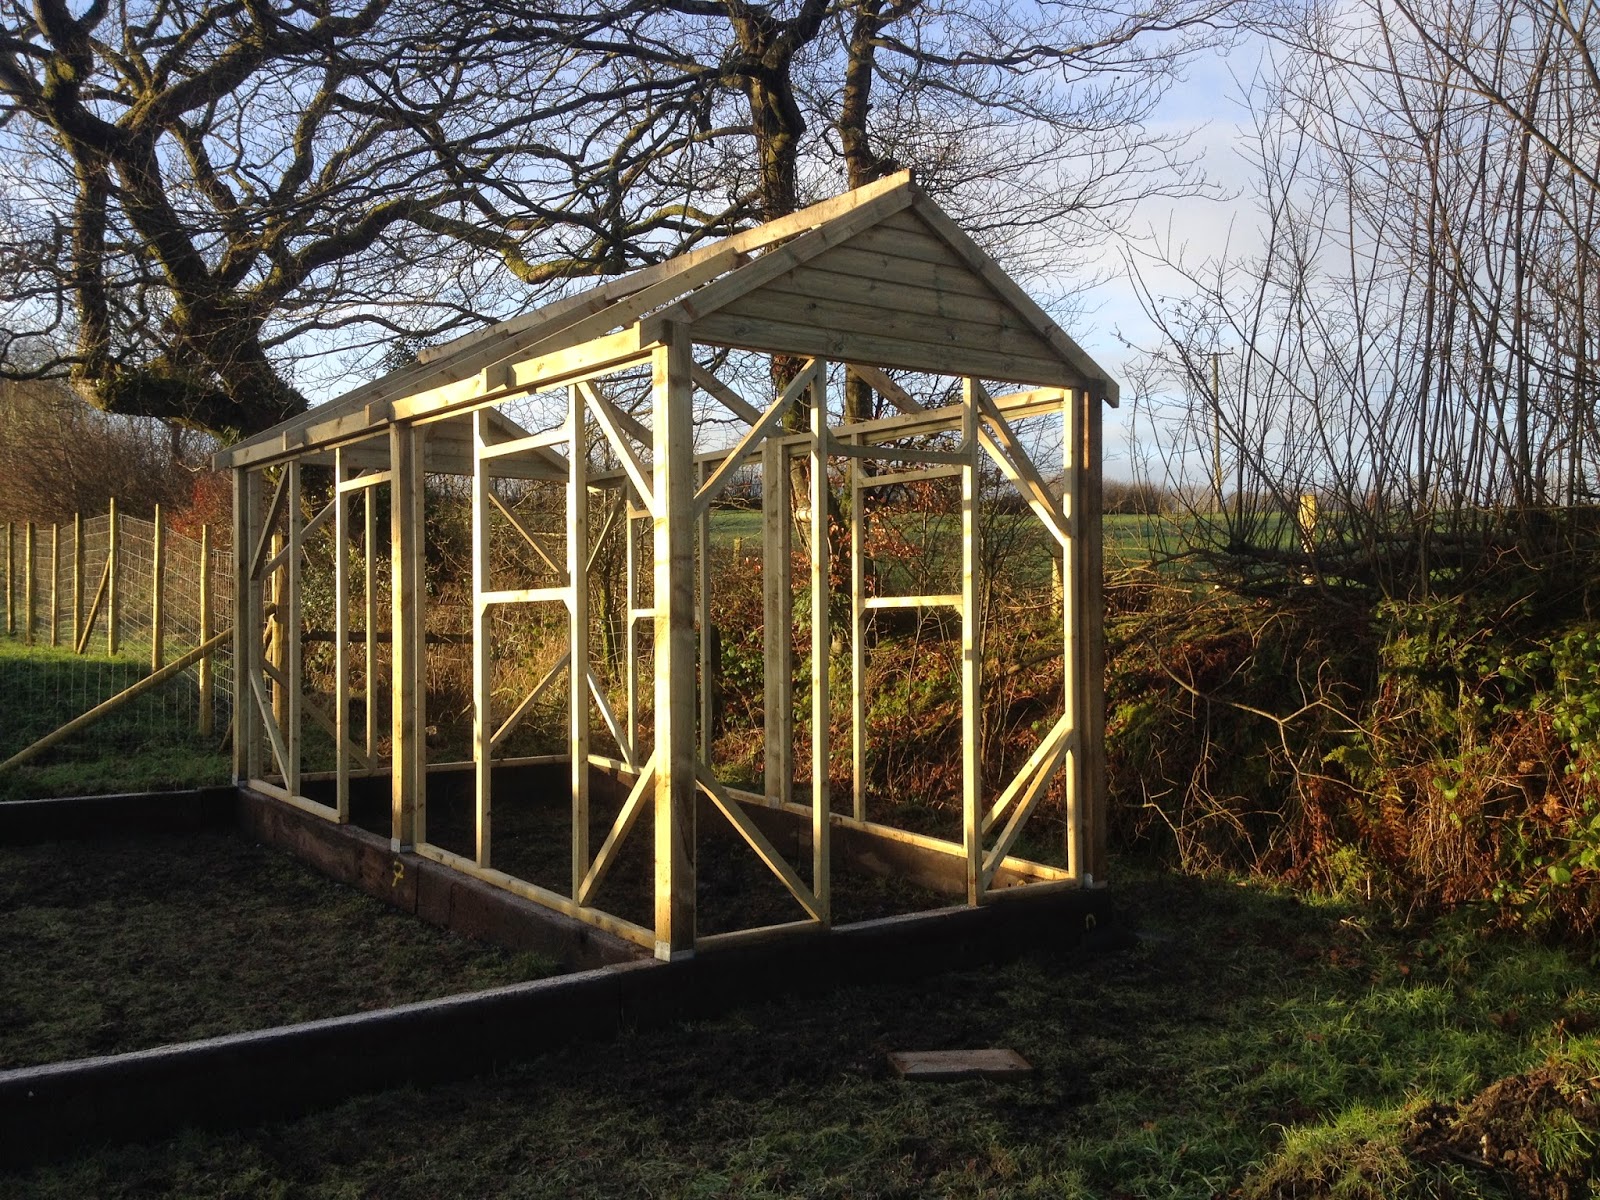
Norman sat down one evening in our kitchen (which he built - more about that in a separate post) with a sheaf of paper and a bottle of wine and sketched out details of all the joints I would need to use. 
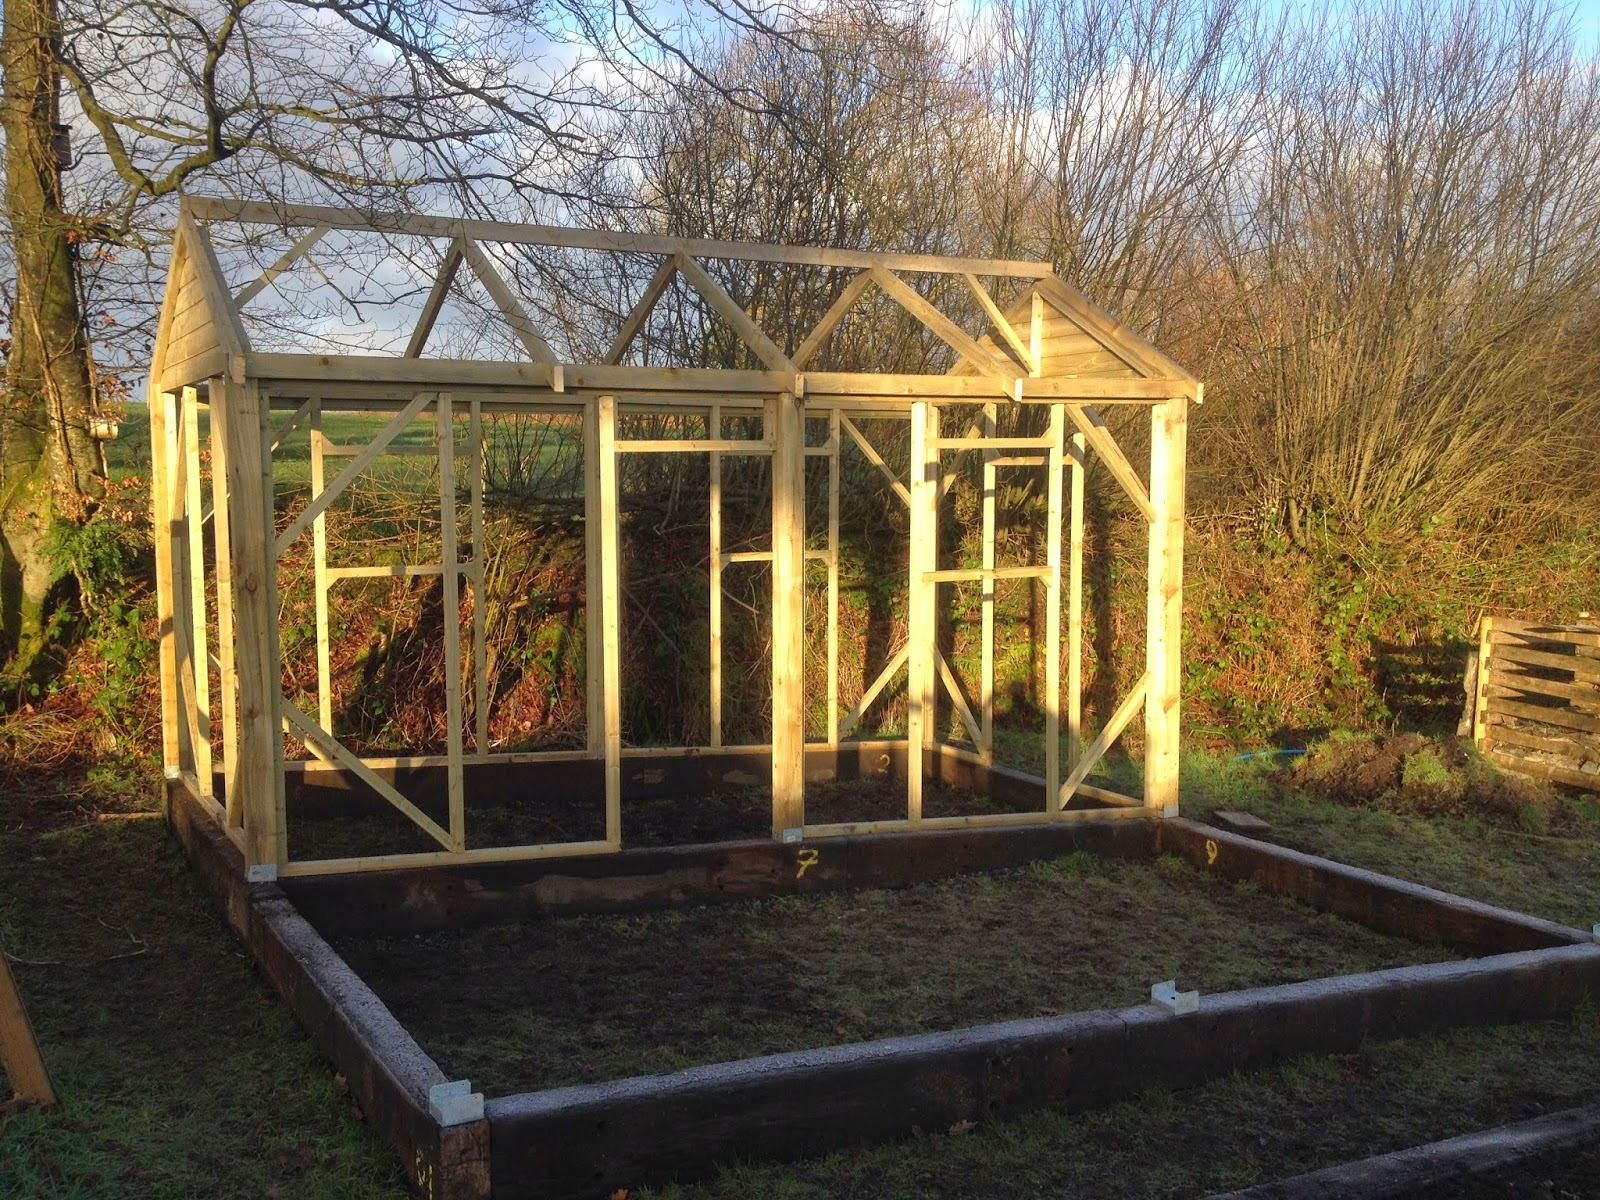
During several site visits to inspect progress both Norman and Alec politely suggested, independently, that some bracing would be a good idea otherwise it was likely to collapse during the first storm.
I therefore spent the weekend adding corner braces as well as the roof trusses and window openings. It is  now perilously close to getting a roof. 


Friday 16 January 2015

Hen House Part 3


Once the base was completed it was onto the frame.  The nine posts were cut to length and notched to accept the purlins.   That proved to be the easy bit...


A jig was made up on an old pallet to help cut the roof angle for the end frames and the roof joists.  All the frames were screwed together with 6x100mm screws and then these were in turn screwed to the posts and sleeper base.

It took about 3 days to make all 6 frames and then assemble them.

The shiplap cladding had to be fixed on the hip ends before the roof trusses could be installed.  Again the jig proved useful to get all the angles right.  We did think about cladding the frames first, however, they would have been too heavy to lift so it will all have to be put on in-situ.

I am borrowing a nail gun to do the rest of the cladding which should hopefully save my fingers from being repeatedly hit with a hammer.

That was as far as I got in a my week off and then it was back to work.  The rest will have to be completed at weekends.


Sunday 11 January 2015

Hen House Part 2

Next up was cutting and joining the sleepers.  This was a messy business as the sleepers were covered in creosote and so had to be handled with care.  It also took two of us to move them about.

The sleepers were cut to length with a chainsaw.   The years of grime cemented to the surface of the sleepers with creosote blunted the chainsaw very quickly and so it had to be sharpened every other cut otherwise clouds of smoke were generated rather than a shower of fine chips.

The corner joints were secured with decking screws and the sleepers joined end to end with 200mm  long 10mm dia. stainless steel dowels which were then grouted into place.   I made a template to make sure the dowel holes lined up.

Once all bolted together, the locations of the 9 posts were set out and the sleeper base 'adjusted' with a sledgehammer until it was square.


Each of the posts will sit on a bolt-down base secured with coach screws.

Next the posts and framing.


Saturday 10 January 2015

Hen House Part 1

The hen house has been long in the planning....  Rather than buy a new house we decided to build our own so we get exactly what we want.  It will basically be 4.8m long and 2.4m wide with a covered veranda, again 2.4m wide, and will link into the fenced-off orchard.
 
 The first challenge was the slope of the land where the house is going.  Like the rest of the garden it gets very wet during the winter and so the floor has to be raised.


There is about 0.35m slope over the length of the house which might not sound much but would require a retaining wall around 0.5m high at one end if the floor is to be level.

We looked at options including railway sleepers and blockwork walls, however, in addition to the expense, it was the volume of fill that would be required that made this a bit more of a challenge than we wanted to take on.
 
The decision was therefore made to live with a sloping floor, although the roof would be kept horizontal.  The frame of the house is to be built off railway sleepers on edge to raise the floor around 0.2m above the surrounding ground.   This will still take some filling....
 
The plan was to start construction over Xmas and New Year and I took the first week in January off to get stuck in.
 
All the timber:
  • 10 No. reclaimed railway sleepers
  • 9 No. 100x100 fence posts
  • 52.8m of 50x100 studding
  • 124.8m of 50x50 framing; and
  • 302.4m shiplap cladding
was ordered from LBS in Pembroke Dock and delivered just before Xmas.
 
The first task was to provide a base for the sleepers to ensure they would be level.  The four corners were set out as accurately as possible (checking the diagonals to ensure it was square...) and then the top soil was dug out.

As a bit of overkill the bottom of the trench was lined with geofabric before being filled with 20mm limestone chippings (we use tonnes of this for paths, drains etc. and always have  stockpile), tamped down and levelled off.

Next task sleepers!


Wednesday 7 January 2015

Hemmed In

Having dabbled with a few hens (we have had up to 10 so far) and with a seemingly ready market for our free range eggs, we decided to up increase the size of the flock.  This of course has a number of knock on effects; a larger enclosure and larger hen house.

One of the main issues is security from natural predators and we wanted something a bit more substantial than the current 50m electric net fence although it has served us well.  Friends of ours run a 4,000 bird free range poultry unit supplying Waitrose so we went on a fact finding mission to look at their fencing.   They have used a 6' high wire mesh fence with electric nose and climbing wires so we have copied their set up albeit on a smaller scale.

The plan was to fence in the orchard and pond so we could keep the hens and ducks together.  This required about 150m of fencing and as we didn't fancy installing all the posts manually (60 or so ...) we got some professional help.

The original energiser for the mesh fence was suffering from spending 3 years exposed to the elements and seemed to destroy batteries on a regular basis.  We therefore bought a new mains powered Hotwire Gemini 80 which is installed in the barn with a lead out cable to the fence.  The fence has two nose wires at ground level and a climbing wire along the top.  This should discourage any attempt to dig under the fence as it would have been too much of a project to dig it into the ground.

The inflow to the pond was left as a channel which had to be infilled and replaced with a small pipe.  This stops flood flows draining through the pond which would overwhelm the small spillway and risk washing away the embankment.  With the fence installed, it was then time for the hen house....

Thursday 1 January 2015

Pond Life


After an absence of a couple of years it is time to update the Blog with details of some of the projects we have completed (and then try to keep it up to date...)  So in no particular order...
 
Following the demise of Pippa, Will needed some new companions so we bought three more ducks.

There was clearly a slight communication breakdown with the breeder as whilst they might be Campbells, they clearly are not Khaki....
 
We now needed a bit more than a paddling pool for them to swim in so got a local groundwork contractor to dig us a pond.  It was partially cut into the slope of the field and water retained with an embankment.
 
The pond is filled from the stream that runs down the side of the field, however, this dries up in the Summer and so time will tell if we need to install a liner.


However, at the time when it was dug (March 2014) it filled up in about a day.  As small spillway returns the flow to the stream.


We now have four very happy ducks who reward us with an egg a day (well three of them do; Will has gone into retirement)